

How to Take Better Cellphone Photos | PCP
Posted by Zoe Papas on Sep 22nd 2023
Cellphone cameras have come a long way, the quality offered on the latest smart phones is similar to many high-end cameras. The difference is that cell phones do not have a lot of the manual settings and are therefore less adaptive to different types of shots. However, there are still ways to improve your cellphone photos by considering the different settings as well as how you set up your shot.

Picture size
You can adjust the resolution and proportion of your photos from your smart phone’s settings. This can be found by clicking the gear icon when you open your camera app. Most phones have a default proportion of 4:3, but if you are looking to take square photos to share on Instagram, you can set the proportion to 1:1. Make sure the resolution is set to the largest possible size to get the best quality photos. Regardless of the resolution, your photo quality will suffer if you use the zoom function to take a shot. Instead, get as close as you can to your subject and try to avoid using it altogether.

Voice control
Sometimes when you are taking pictures and you go to press the shoot button, your hand shakes and your photo ends up blurry. To avoid this, you can turn on voice control in the camera settings which will make your phone respond to a certain word like “Smile!”
Lighting
The flash can be found in either the settings or on the main screen when you go to take a photo. It looks like a lightning bolt symbol. The best-case scenario is to turn the flash off and use natural lighting, but you may need it in a very low light situation. If you are photographing a piece of artwork with your phone, it is best to do so outside on an overcast day to achieve even lighting. If you’d prefer to photograph your artwork inside, you can place your artwork upright on an easel with 2 photography lights on either side pointing at 45 degree angles to the easel. If you are going for professional quality, we offer fine art scanning services.
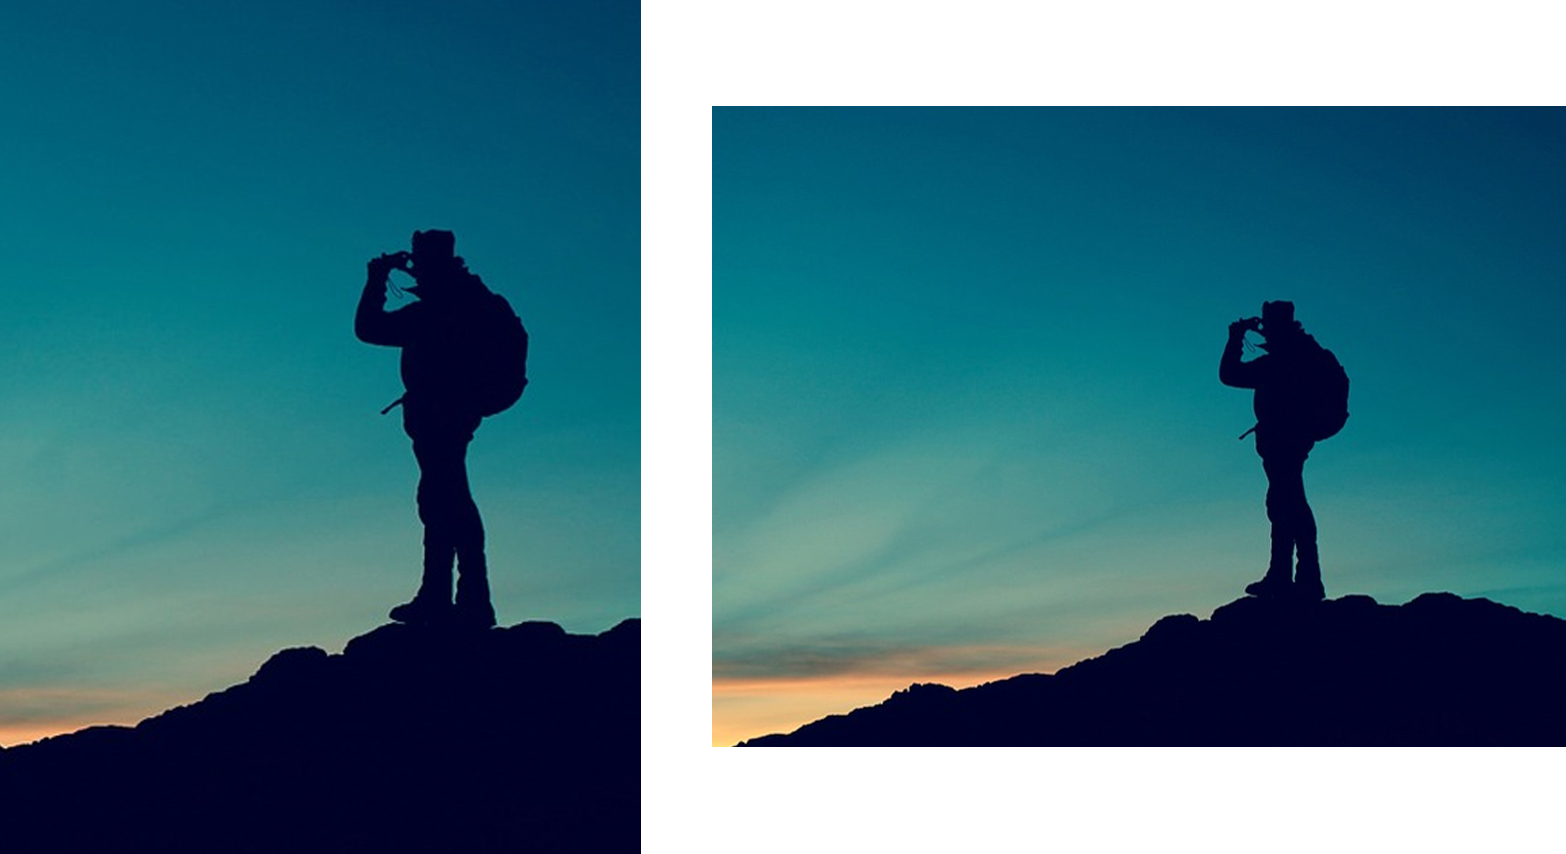
Grid
You can turn on the grid function which places lines over your image. This is very helpful for creating a good composition according to the “rule of thirds.” Place the subject off-center, either to the left or right, and line up with the grid lines to create a visually pleasing composition. Points of intersection draw the eye to important areas like a person’s head. If a person is looking in a direction, there should be more space on the side he/she is looking towards.
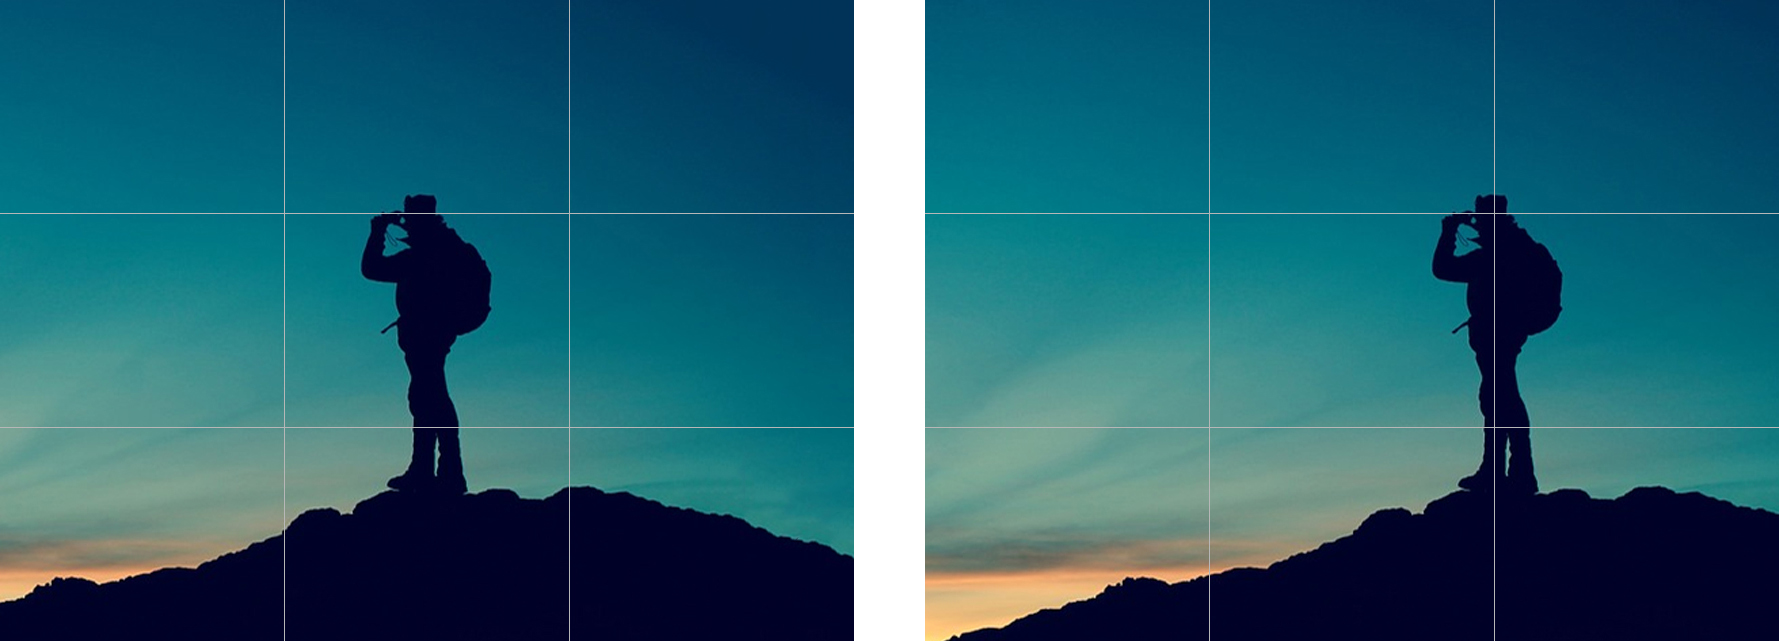
Another thing to think about is whether you want your image horizontal or vertical. It can make a big difference in a shot such as this. The horizontal version makes sense because the person is looking out at the vast landscape.
Transferring Your Photos
Once you have a photo you like, you may want to edit it on your computer in Photoshop. There are multiple ways to go about transferring your photos to your computer. You can directly transfer your files using a USB cable. You can also email the files to yourself as an attachment and download the photos onto your computer. One of the most convenient ways to go about this is to use an app set up for transferring photos. Google Photos is a great solution because it automatically backs up your photos onto your Google account and you can then access them from any device connected to the internet.